Firstly, I must give a big shout-out to the Ne Cede Malis website. After seeing the work whilst looking through Pinterest, and then following the links to the website, I was immediately inspired to create my own unique army to be used in games like Kings of War, Dragon Rampant, Pillage and Frostgrave.
I’ve always loved the Dark Souls series of games, with Dark Souls 3 being my favourite. One of my most memorable parts of that game was the Ashes of Ariandel DLC. The lore and aesthetics, especially the frozen Winter landscape and Followers of Farron, really appealed to me.
So, I had my inspiration.
Now was time to select the miniatures. Having read the lore surrounding the Followers of Farron, and their tall pointed helmets, plus reading about the conversions of Ne Cede Malis and their projects, I decided on the Victrix Norman infantry. I already had a few spruces of these, so all I needed to do was assemble them, then think about how to make them look more like the Dark Souls characters. For this, they would need cloaks and furs.
The method for the cloaks was taken from Peachy Tips and using masking tape. The furs I would make from Milliput. Whilst I had the Milliput mixed, I then also used this to hide the pudding bases on the bases of the miniatures.
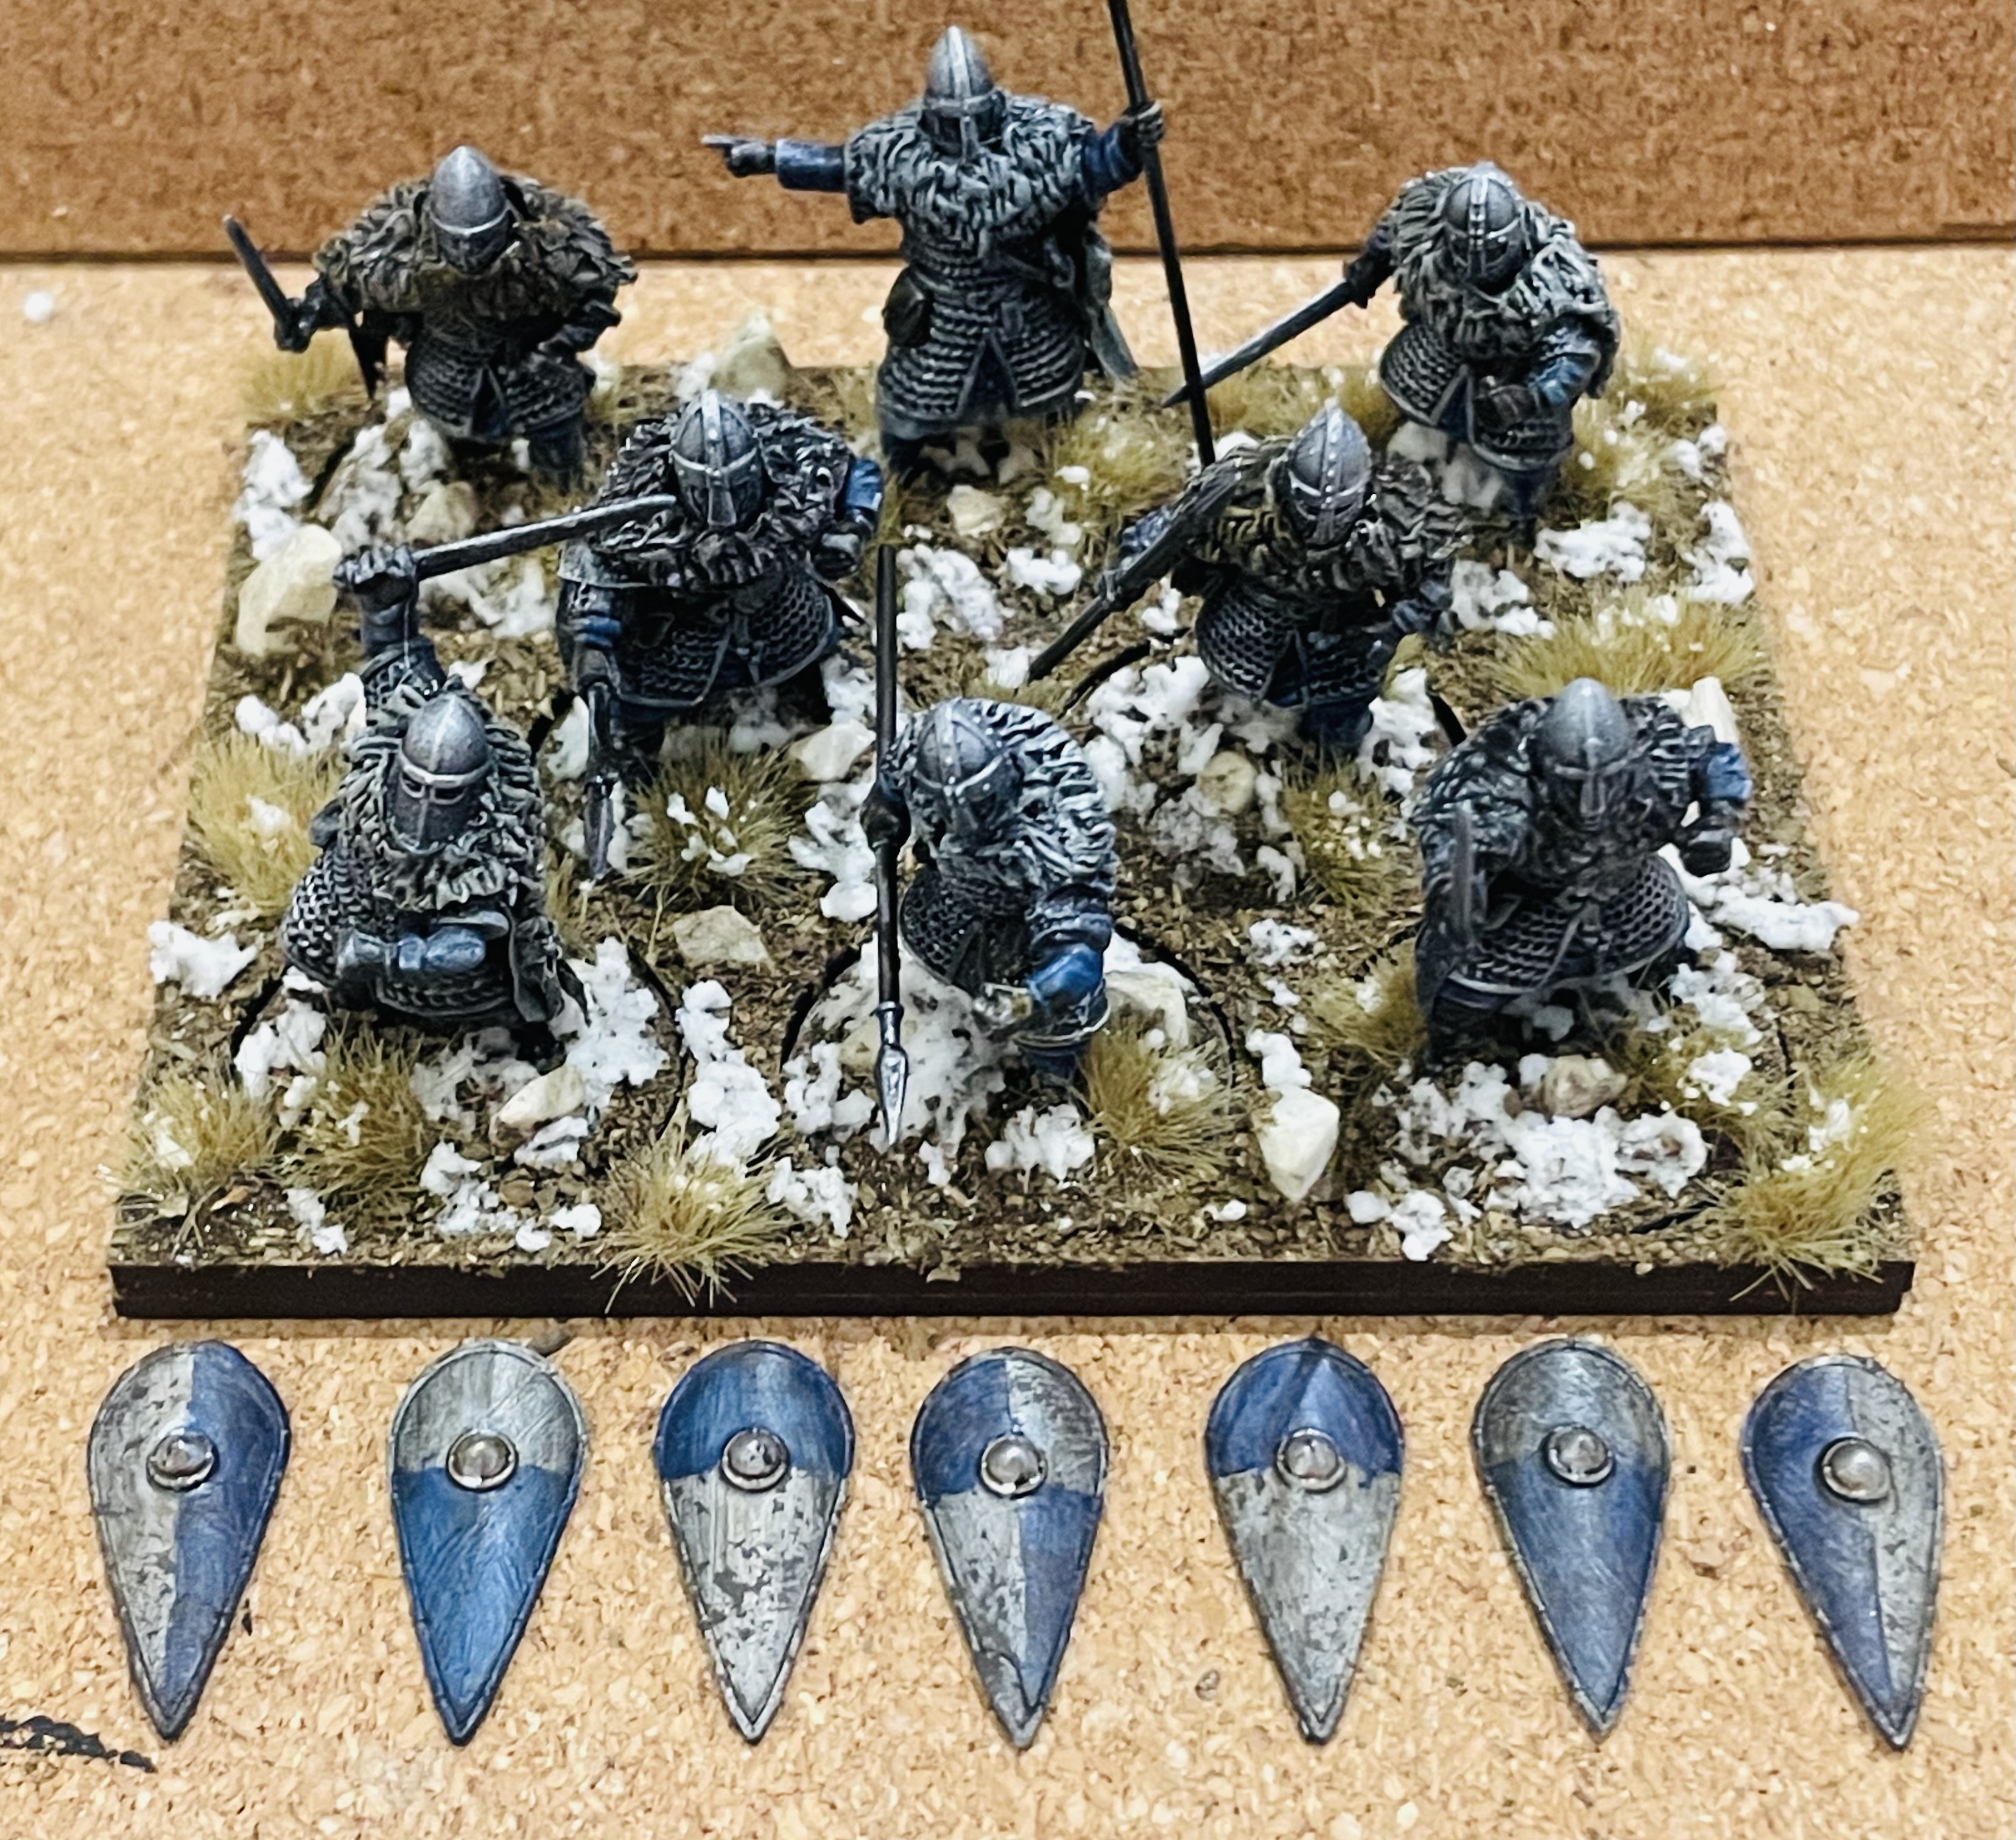
Next was priming. Nothing too fancy, simply sprayed black, dry-brushed grey-blue, then dry-brushed white.
The painting process was very simple: I’m not aiming, or have the ability, to paint anything award-winning.
Army Painter Speedpaints were used on almost everything. Blue for the legs, sleeves and robes; brown for the boots, gloves, weapon handles and accessories; silver for the armour and blades, and different shades of browns, greys and off-whites for the furs.
Everything was then given a brown wash. A final highlight of silver for the metal parts, and white for the furs finished off the painting.
Now for the basing. Again, nothing fancy: dried green tea leaves for the base material, with a couple of rocks and clumps added. Finally, a GW fake snow paint was scatted on top.
The final task left was to complete the shields. After attempting and failing a freehand design to match the in-game DS3 shields of the warriors, I opted for more simple two-tone designs. Similar to before, a simple black primer was used followed by a white dry-brush. I then used masking tape to mark out the different area, and painted one part blue, and left the rest.
A bit of wet kitchen roll was needed to tidy up any areas where the colours had ran. A metallic silver paint was then used for the central boss. Once it was all dry, I used a brown wash over everything, a single metallic silver for the highlight, and sponged on some GW brown paint for the weathering effect. I decided to keep the shields separate from the models, so that I can choose different options in games that are WYSIWYG, and just use a small bit of blu tack to attach them when needed.
The final result - All the models in a custom Kings of War regiment tray from Warbases:


Really nice, and those cloaks came out brilliant
ReplyDelete